Install with Google Tag Manager
Load Luria from a Custom HTML tag on All Pages, and fire the conversion from a second tag on your thank-you trigger.
About 8 minutes
What you'll need
- Your Luria tag, with your site ID already in it. You get it during onboarding, or email hello@luriart.com and we will send it to you. The dashboard does not show the site ID yet.
- Publish rights on the Google Tag Manager container that runs on your site.
- The URL path of your thank-you or confirmation page.
A direct head install is better when you can do it
Google Tag Manager loads after your page has started rendering, so a variant lands a beat later and visitors may glimpse the original text first. If you can paste into your site's <head> yourself, use the script install. Use Tag Manager when it is the only access you have.
Step 1: Create the Luria tag
In Tag Manager, go to Tags, then New, then Tag Configuration, then Custom HTML. Paste this, with your own site ID in place of YOUR_SITE_ID:
<script async src="https://luriart.com/snippet.js" data-luria-site="YOUR_SITE_ID"></script>Leave "Support document.write" unchecked. Name the tag "Luria".
Paste it whole
Luria reads your site ID off the tag itself. If you retype the ID or wrap the tag in other markup, nothing loads and your site is untouched.
Step 2: Trigger it on All Pages
Under Triggering, choose the built-in "All Pages" page view trigger, then save. Luria has to load on your landing pages and on your confirmation page, so anything narrower will break attribution.
Step 3: Create the conversion tag
Add a second Custom HTML tag with this in it:
<script>
  (function () {
    var n = 0;
    (function go() {
      if (window.luria) return window.luria.convert("purchase", 129.00);
      if (++n < 40) setTimeout(go, 250);
    })();
  })();
</script>
Change the goal name and value to match what happened: window.luria.convert("purchase", 129.00) for a sale, window.luria.convert("lead") for a form, window.luria.convert("booked_call") for a booking. If the order value is in a data layer variable, pass it instead of a fixed number.
The retry loop matters here. The Luria tag loads asynchronously, so window.luria usually appears a moment after the conversion tag fires. Tag sequencing alone does not close that gap.
Step 4: Trigger it on the thank-you page only
Create a Page View trigger set to fire on "Some Page Views", with Page Path contains your confirmation path, for example /thank-you. Attach it to the conversion tag from step 3, then submit and publish the container.
If your checkout pushes a purchase event into the data layer instead of loading a new page, use a Custom Event trigger on that event name.
Step 5 (optional): Reuse your GA4 ecommerce setup
Already push GA4 ecommerce events (dataLayer.push({event: "purchase", ecommerce: {transaction_id, value, currency}}))? Then the conversion tag needs no page path. Create a Data Layer Variable named ecommerce.value (call it "DLV value"), put {{DLV value}} in place of the fixed number in step 3, and trigger that tag on a Custom Event trigger with event name purchase. For leads, do the same with generate_lead and window.luria.convert("lead").
Guard against a double fire when the purchase event is pushed again on reload by adding the order id to the retry loop: store {{DLV transaction_id}} in localStorage and skip if it is already there.
Verify it worked
- Use Preview mode to confirm both tags fire: the Luria tag on any page, the conversion tag on the thank-you page only.
- Publish the container, then open your live site in a private window with ad blockers off.
- Open DevTools, go to Network, filter for
luriart.com. You should see calls to/api/patchesand/api/events, and/api/consentthe first time. - In the Console, type
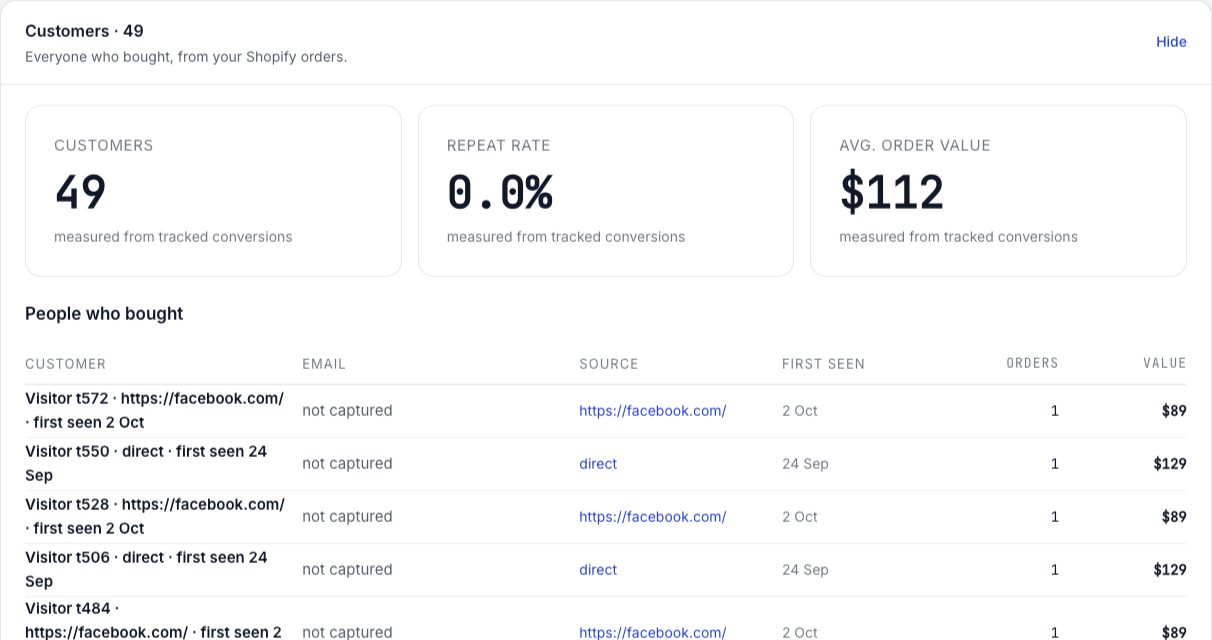
window.luria. It should return an object, notundefined. - Run one real test conversion, then open the Customers section on your dashboard's Overview tab. The converted visit appears there.
Full checklist: Verify your install.
Common failures
The container was never published, or the Luria tag has no site ID in it and the snippet stops immediately.
The Luria tag is not on All Pages. Check its trigger. If it is on All Pages, then Global Privacy Control or Do Not Track is on in your test browser, in which case Luria collects nothing at all by design, or you declined Luria's consent banner in that browser; clear site data and choose Accept.
The conversion tag fired twice, usually a trigger that matches both the thank-you page and a reload of it, or a data layer event that pushes twice. Fire it once per order.
Harmless. Luria ignores the second copy rather than counting twice. Keep the head one and delete the Tag Manager tag.
Expected on a Tag Manager install, because Tag Manager loads later than the head. Move the tag into your <head> to shorten it.